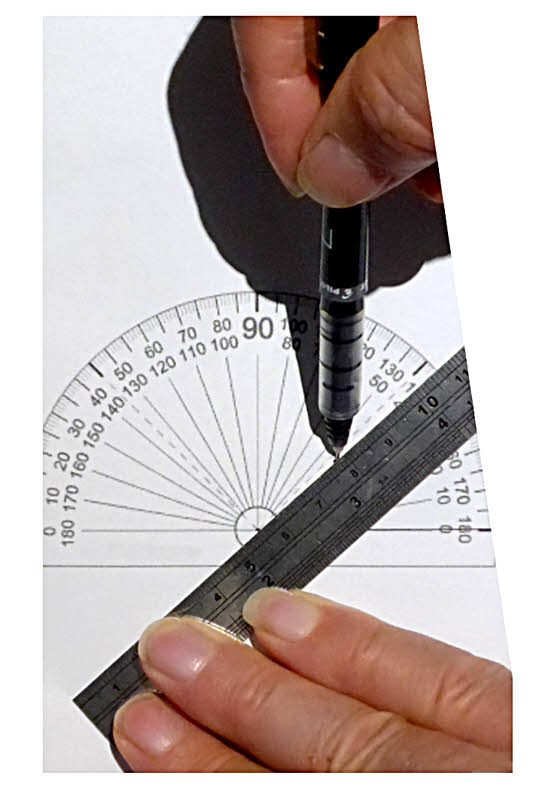
This page will talk about a way to draw an angle of whatever size you need. Protractors are fine... for some things. But not the only way to draw angles.
The way you will be shown has many applications, even though it has been put on the web in the midst of pages about how you can make maps yourself.
This page will explain a way to draw an angle using just a ruler and a compass. (The sort you draw circles with.)
You will start with a point which is where the angle's apex will be, and draw one side of the angle from there.
At a distance chosen by you, from the apex, on the side you've drawn, you'll place another point, which we will call B.
So far, so simple.
Next we will set the compass a very particular radius. I'll show you how to know what setting to use for the angle you want.
The point of the compass goes on "B", and then you draw and arc (bit of a circle) on an easily recognized part of the page...
... and finish the angle by drawing a line from the apex so that it just touches the arc you drew.
That's it! Details below... and a few extra bits along the way.
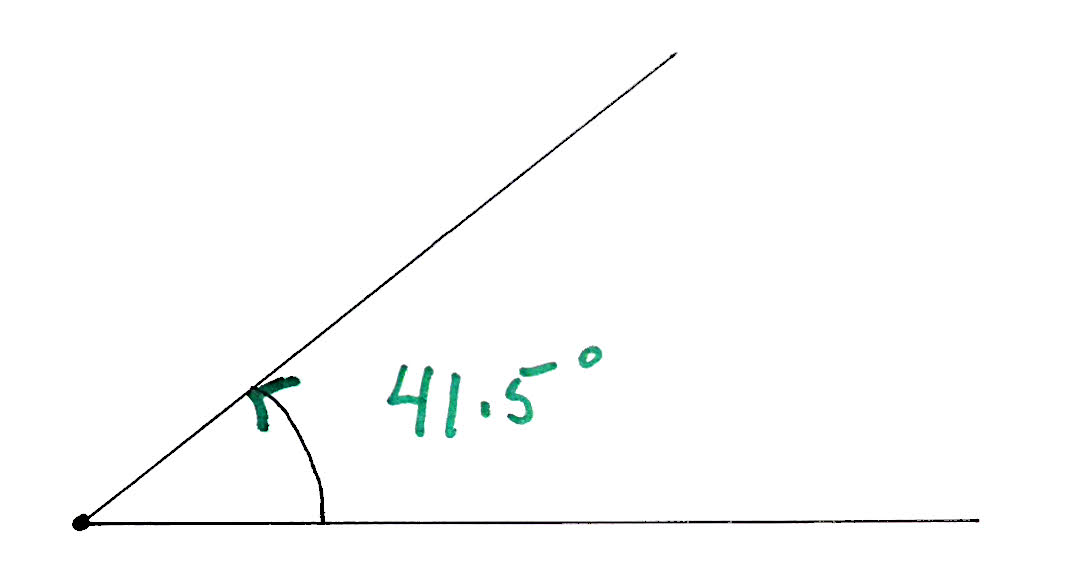
As an example, we're going to draw a 41.5 degree angle. (I picked that number "at random", "out of a hat". There's nothing special about it.)
Just keep reading, for the moment. Bits won't... at first... make sense. But before long, you will come to a heading "What was that all about?". Then you need to go back to reading carefully, making sure you do understand, as you go along.
Where the apex of the angle is we will call "point A".
Points "B" and "C" are somewhere along the two arms of the angle. The usual way to refer to such an angle is "BAC".
If you want to "follow along" (which I strongly suggest), you'll need a piece of paper at least 18cm high and 26cm wide.
I hope your lines will be crisper, finer than the lines you see in the illustrations. I made them fat and dark so you could see them.
Note that I don't try to stop the lines "where they end". I make the lines a little too long, and use a short line across the long line to mark the location of the point I'm adding to the drawing.
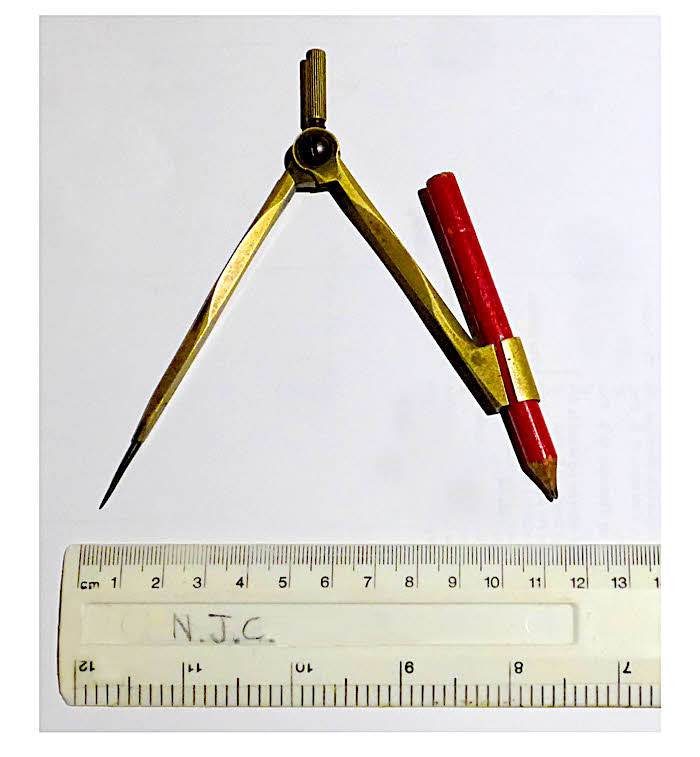
To do this exactly as explained below, you will need a compass which can open at least 10cm, and a good ruler marked in millimeters.
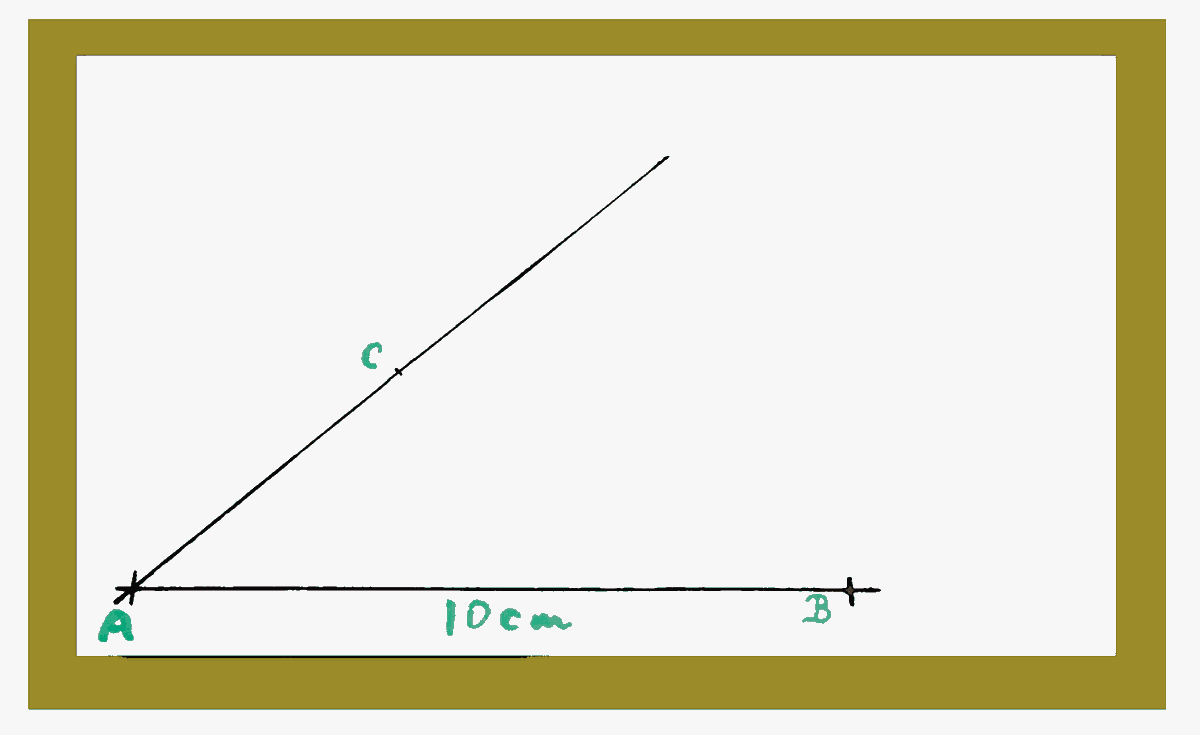
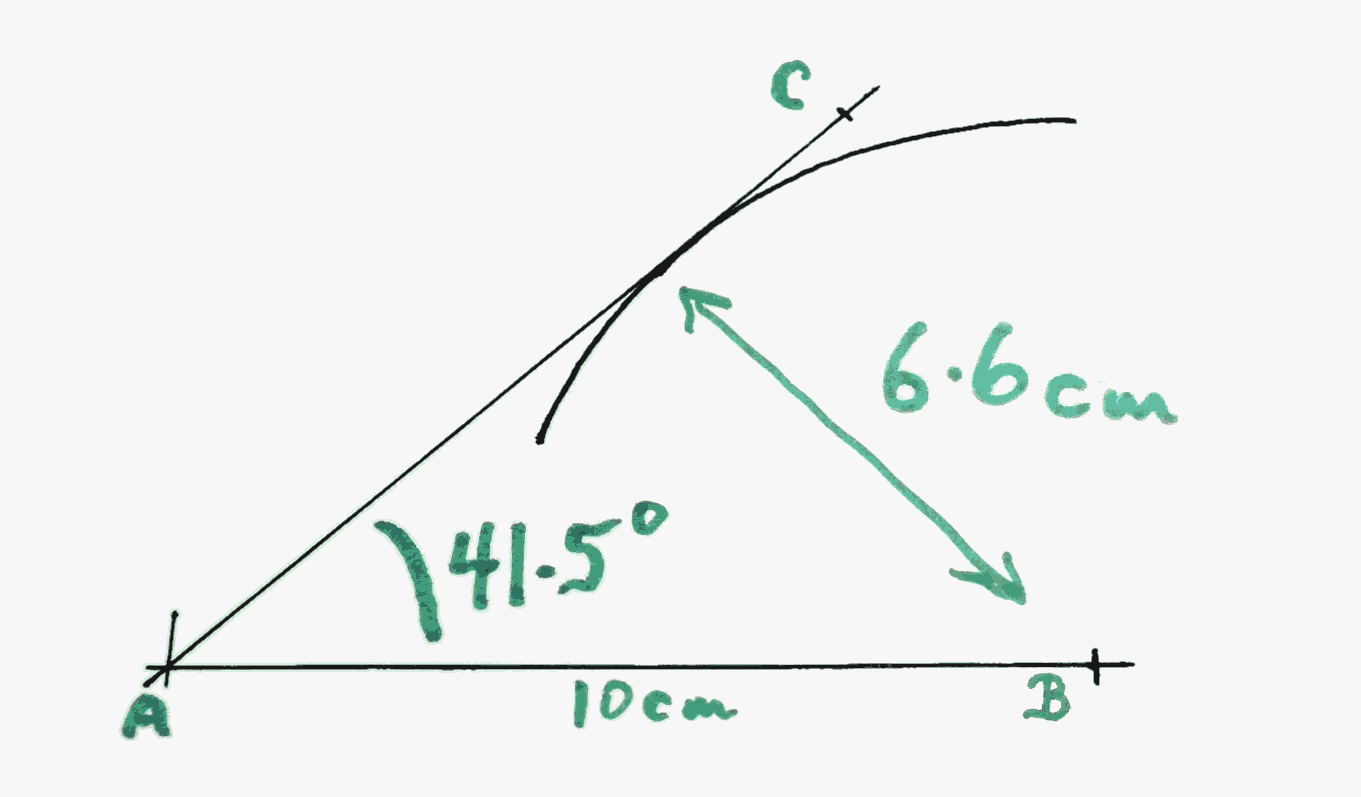
Turn your piece of paper "landscape" on your desk. (I.e., not "portrait". I.e. turn it as shown below.) The next three paragraphs will take you through drawing the line and points that you see...
Draw a line about 11 cm long, about 1 cm up from the bottom of the page, and starting about 0.5 cm from the left hand edge.
Mark point A, on that line, about 1 cm to the right of the left hand edge of the page.
Mark point B on the line. Put it 10 cm to the right of point A. Make that "10 cm" as accurate as you can.
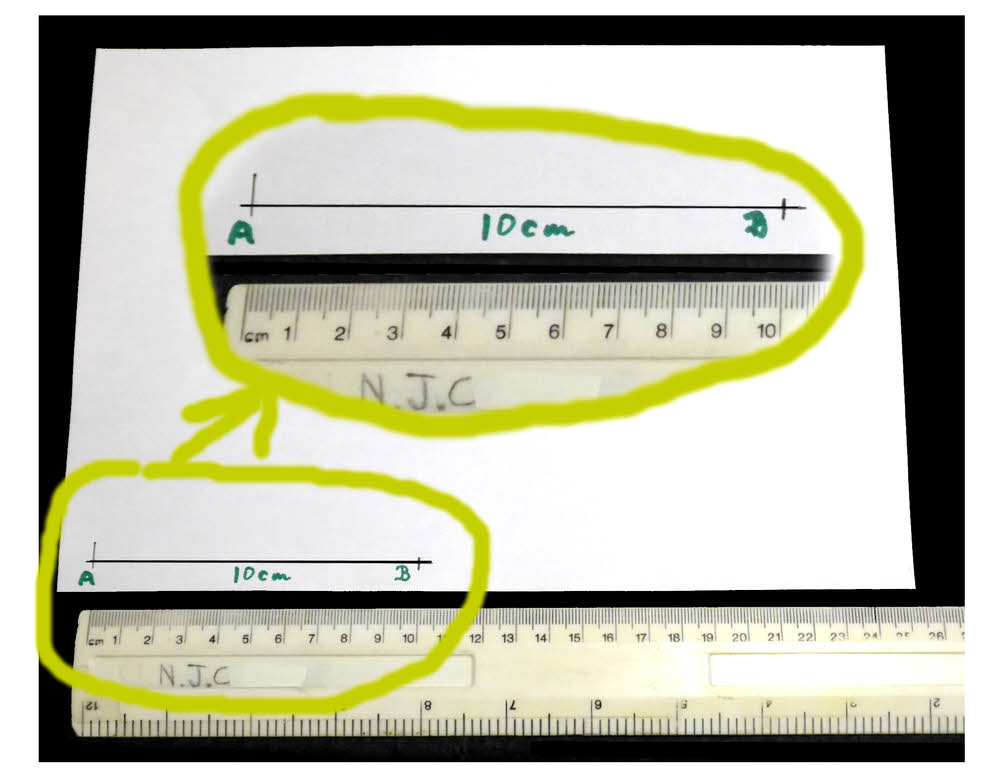
Good! We've got one side of the angle drawn on the page!
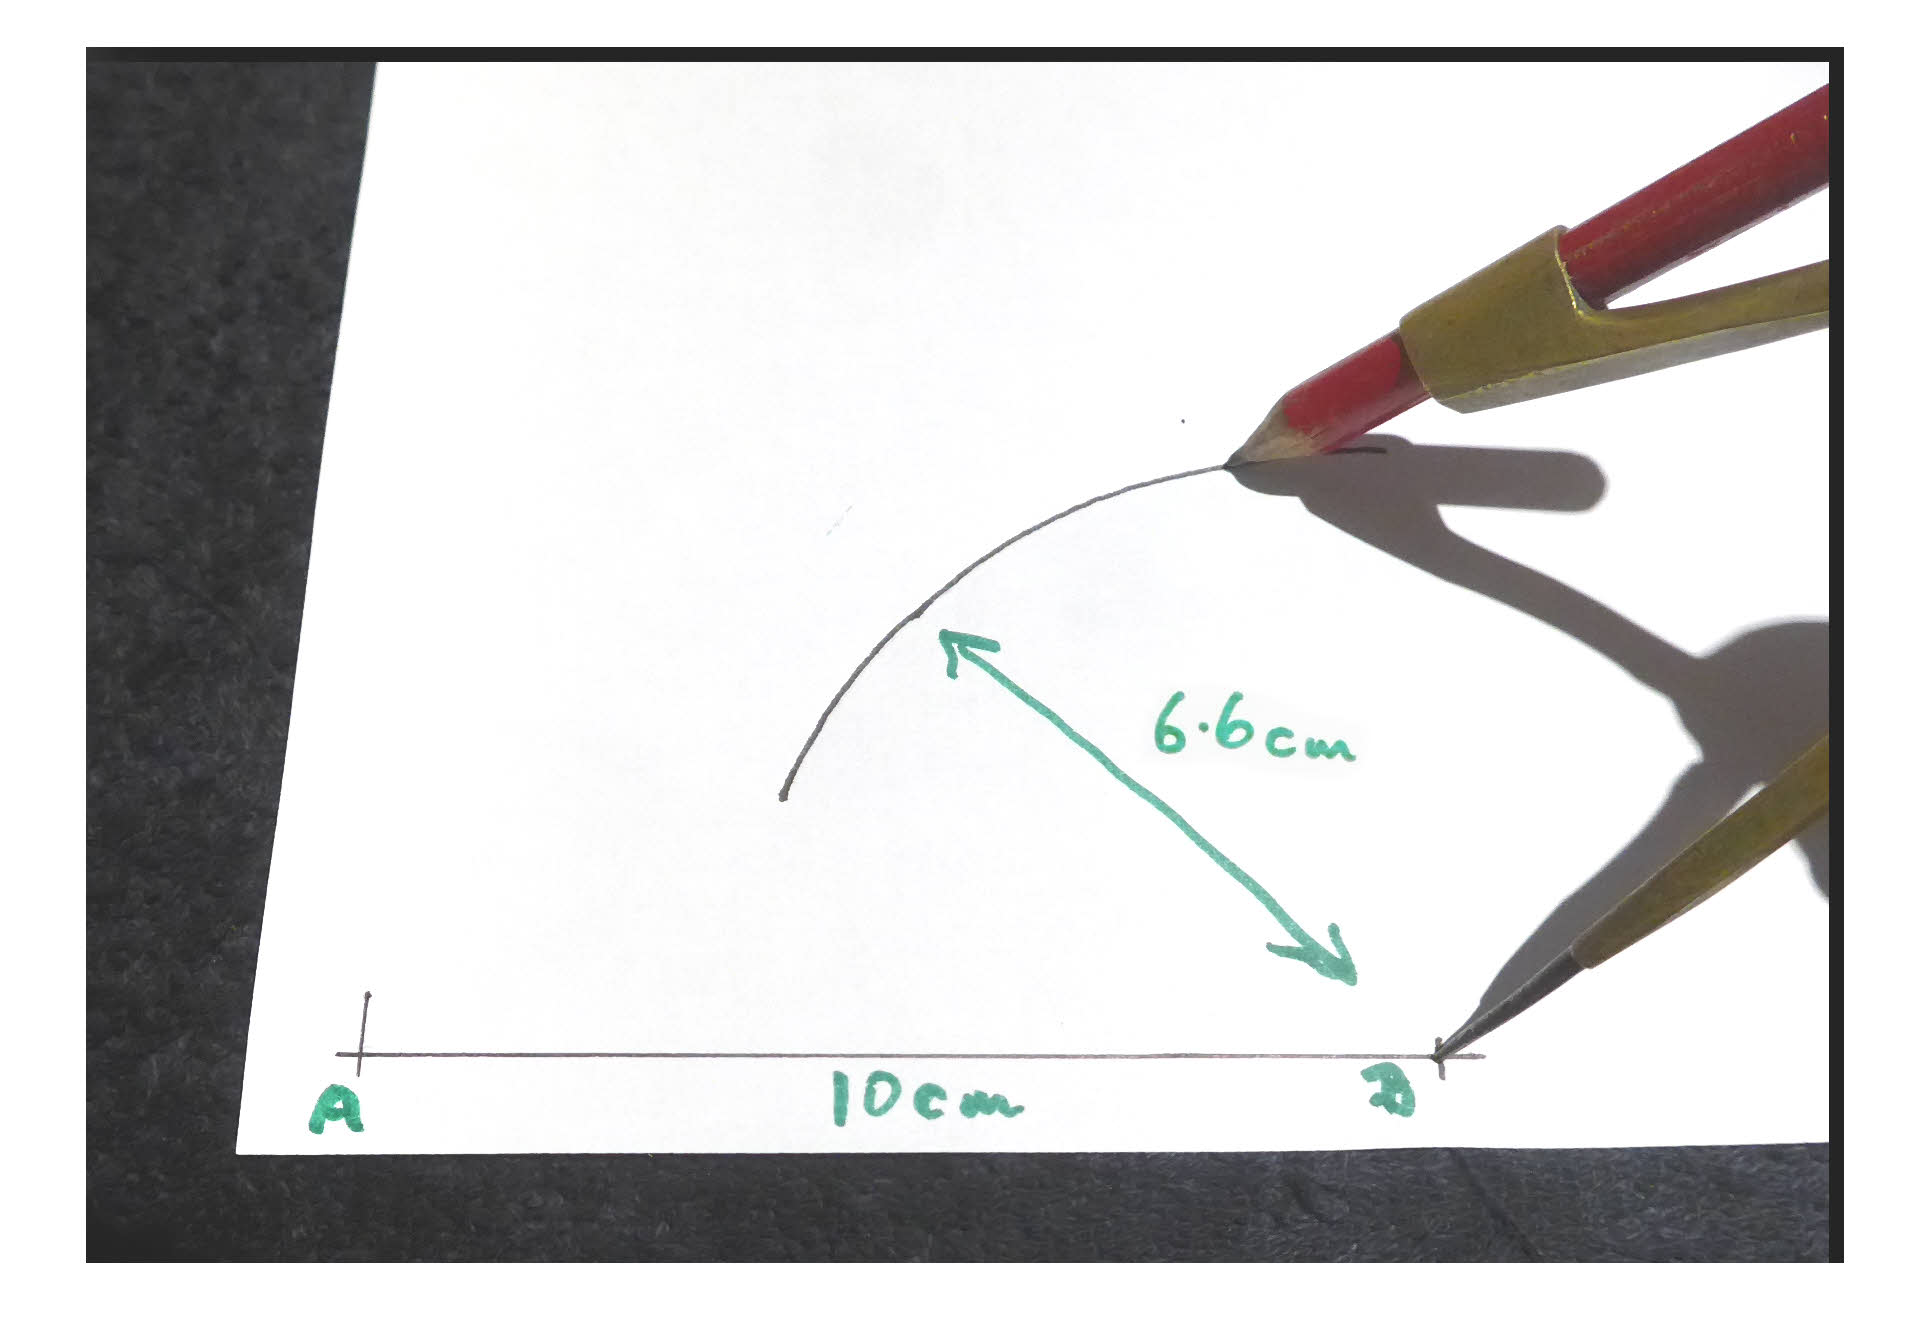
Now set the compass to a span of 6.6 cm. Don't, for the moment, worry about where that number came from. Make it as close to 6.6 cm as you can.
Put the compass point on B, and draw an arc, as shown....
Draw the line from A that "just touches" ("is tangent to") the arc you just drew.
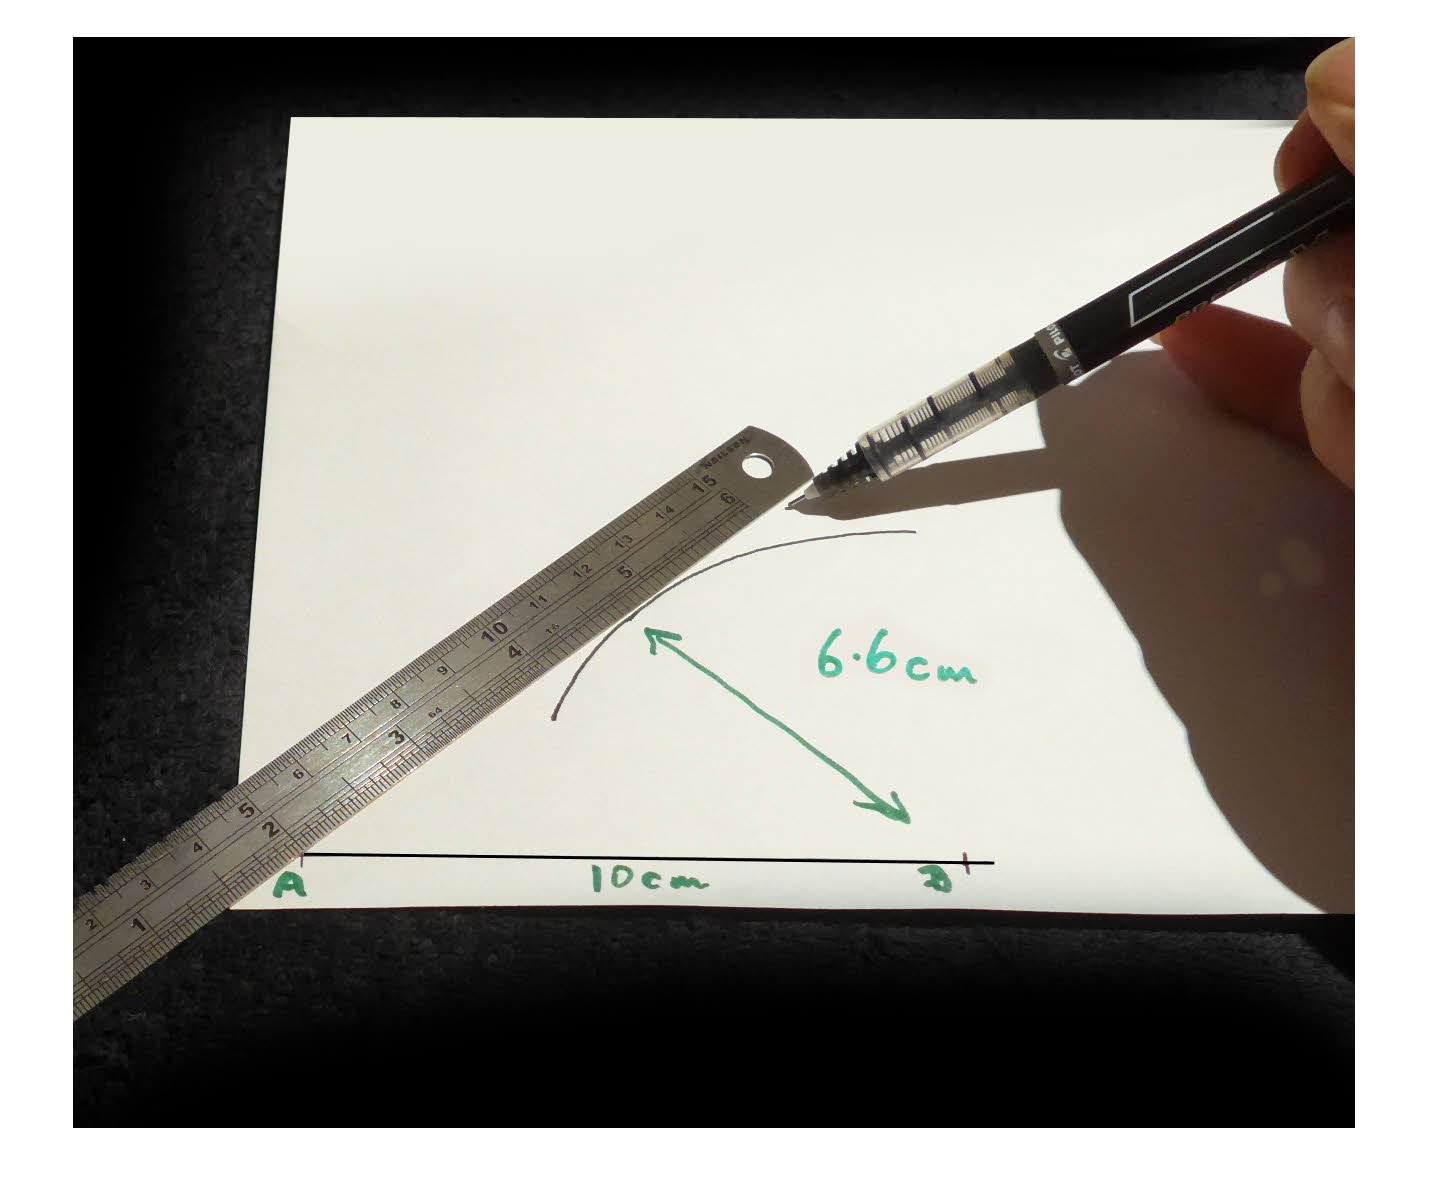
Mark any point that you like on that line "C". (The "C" is only needed to "name" the angle, so I can conclude this with what's next!)
You've done it! You've drawn a 41.5 degree angle, BAC!
Before I go into that, let me mention something quickly... if your compass is big enough, reset it, as carefully as you can, to 14.6 cm. And make a mark, call it D, on the line AB, 22 cm to the right of A, again carefully measured, and do another arc...
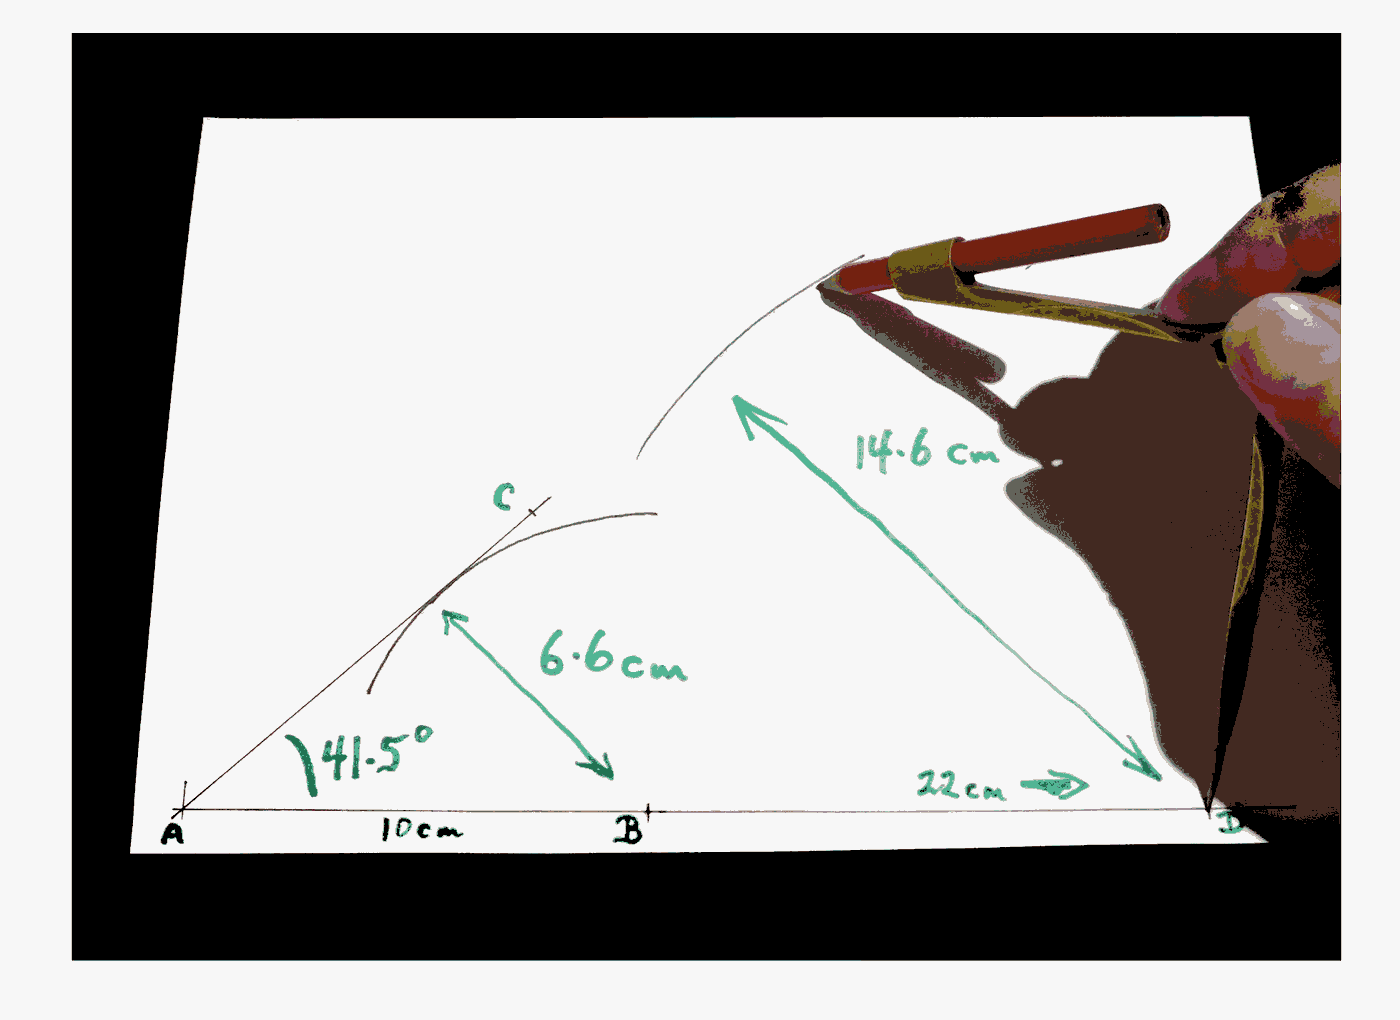
And again draw a line which is tangent to the new arc and passes through "A". Mark a point on the new line E.
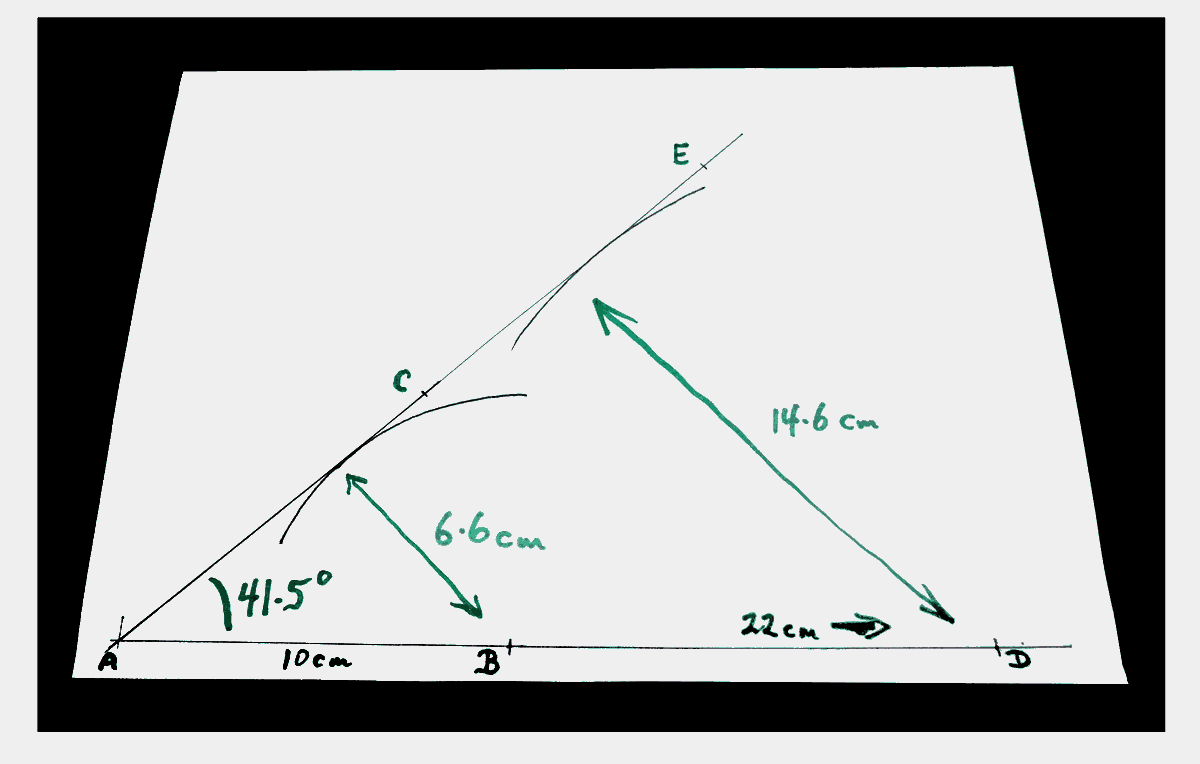
These numbers also result in a 41.5 degree angle. If your BAC isn't quite the same as your DAE, the latter is most likely to closest to 41.5 degrees. Why? Only two things matter: How carefully you measured the two distances. You can probably draw to about 1 mm accuracy. A 1 mm error in a short line, i.e. the 10 cm line AB, is a bigger error than a 1 mm error in a longer line, i.e. line AD.
The description above is all well and good, if you want to draw a 41.5 degree angle. And your piece of paper is the size stated. But what would "the numbers" be to draw other angles?
Here's how we can work out the numbers needed for any angle, any size sheet of paper.
(The bigger the piece of paper, the more accurately the angle can be drawn... as long as you have a suitable ruler and compass!)
Mathematicians invented "trigonometry" not just to harass schoolchildren, but also to solve such problems.
The problem we're dealing with boils down to ...
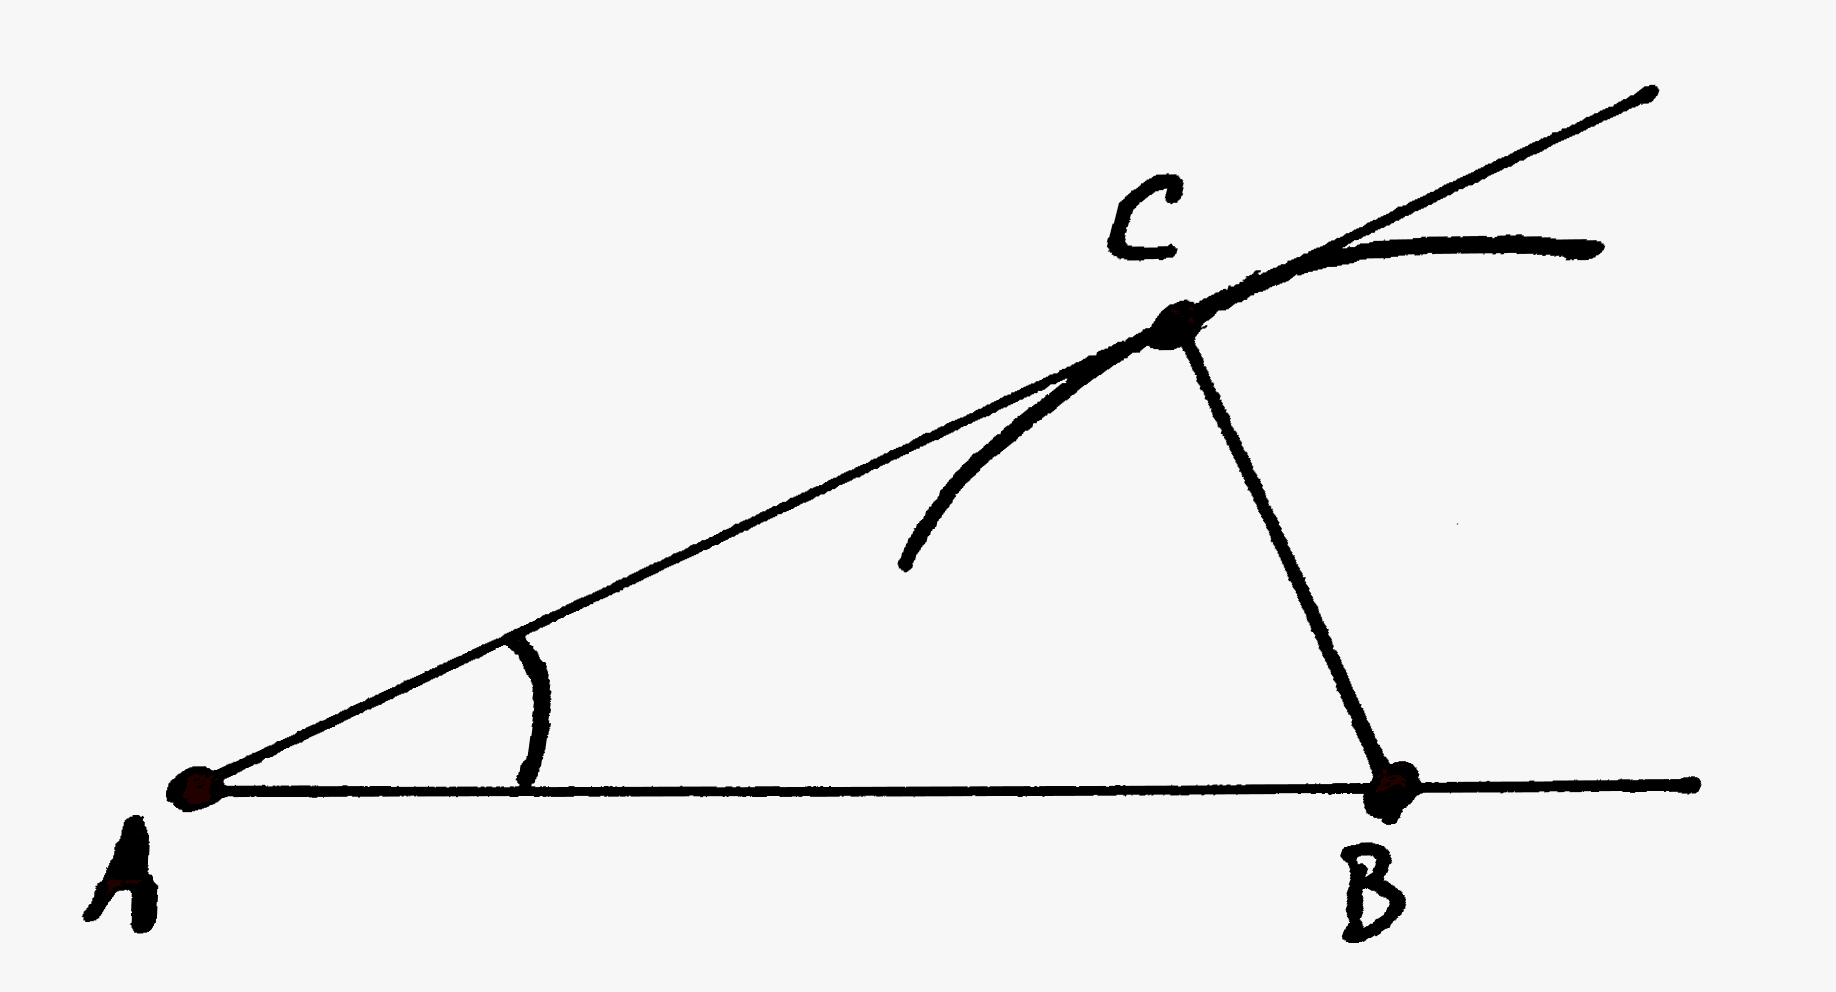
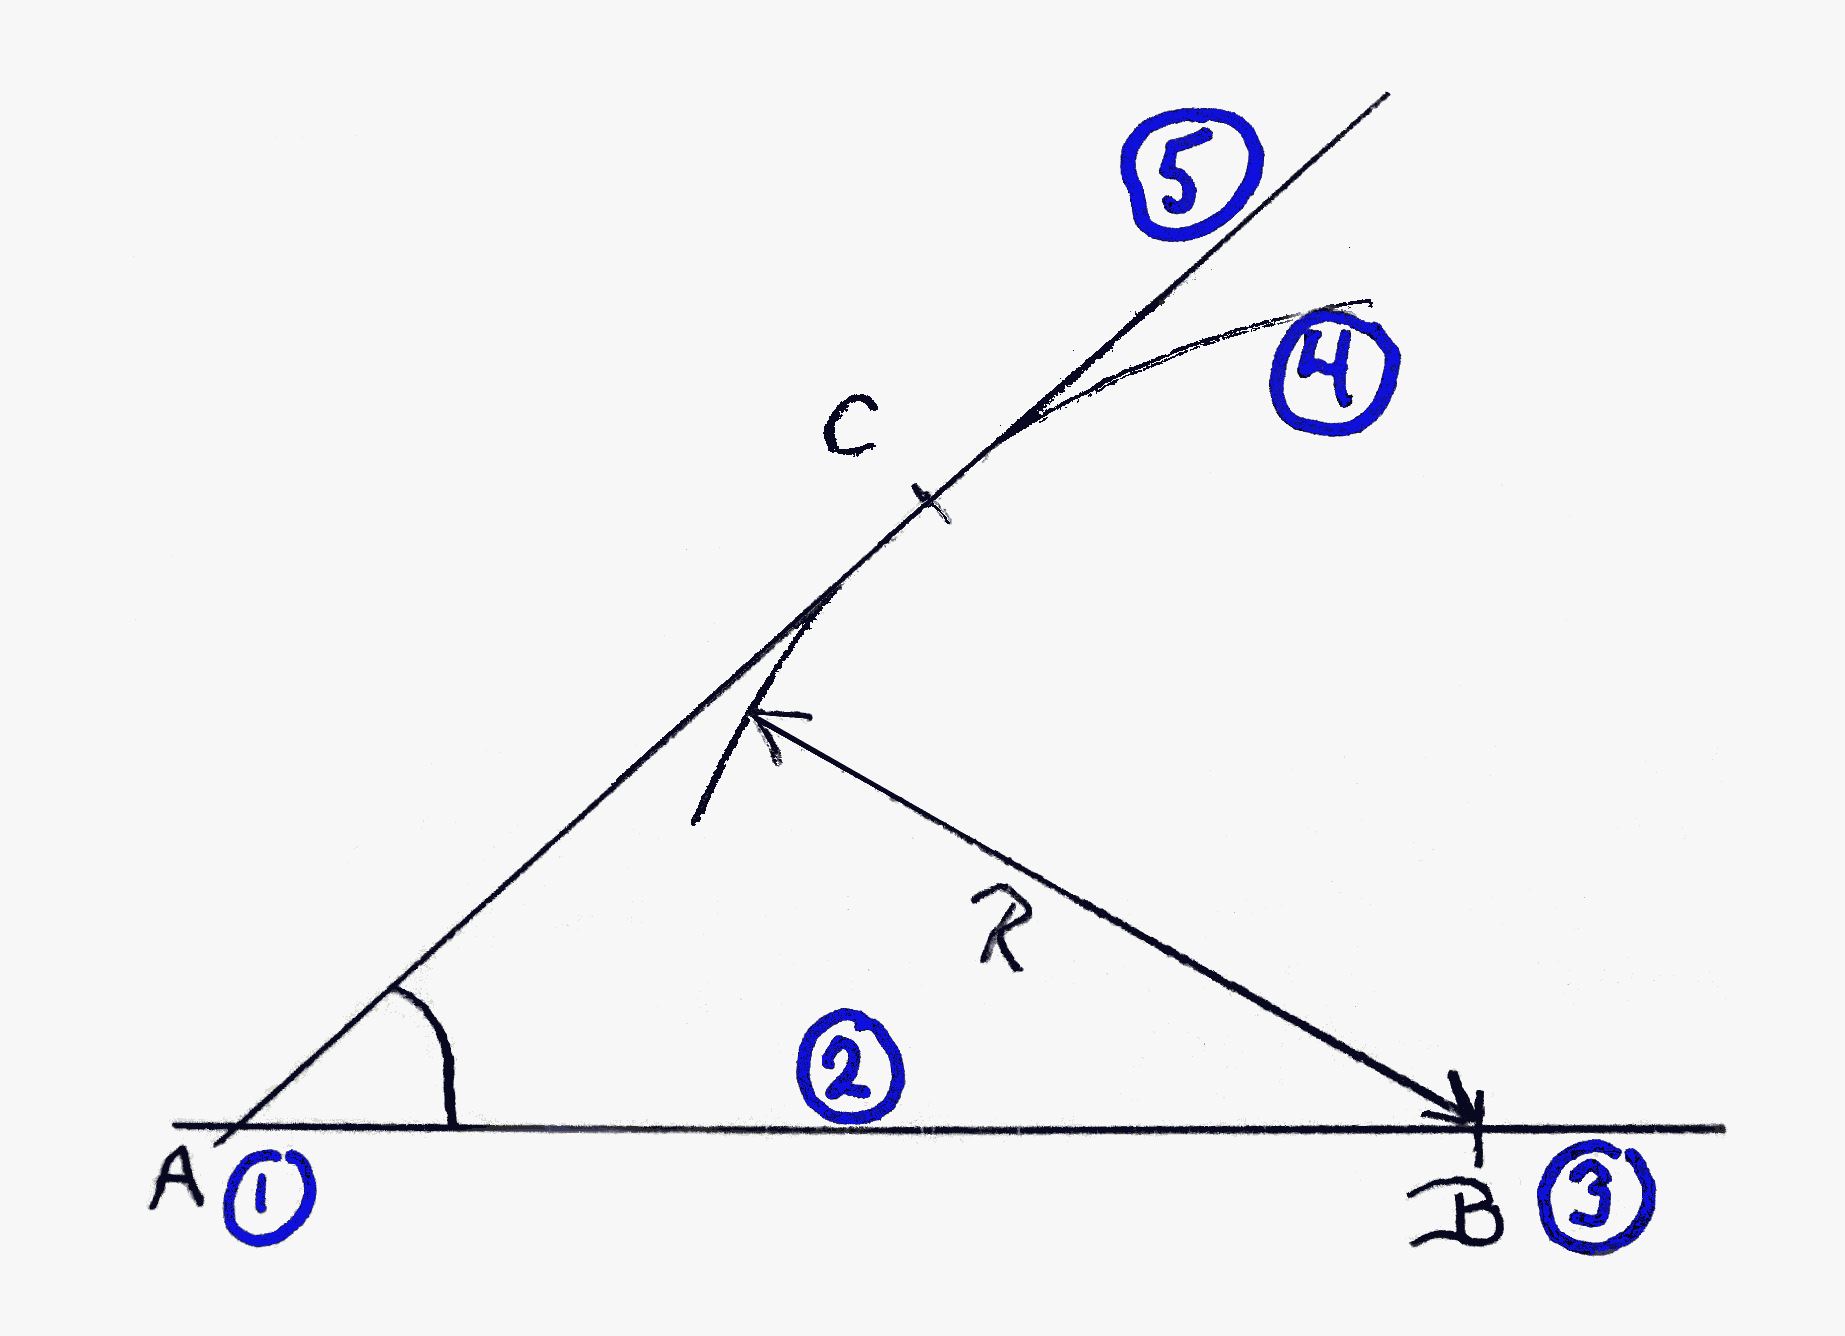
"BAC" is the angle we want to draw. We know how big it is, in degrees.
The "trick" is to realize that angle ACB will be 90 degrees. Once you realize that, if you once studied trigonometry, you will be greatly encouraged. (Note that in this diagram, "C" is not "anywhere along" AC, but is where the line from corner B meets the other line from A.)(My thanks to a page posted by montereyinstitute.org for reminding me of the formula I needed for you, presented below.)
In the example about, we wanted to draw a 41.5 degree angle. Here's how we got the two sets of numbers (10 cm/ 6.6 cm and 22 cm/ 14.6 cm) which were both good for a 41.5 degree angle...
We chose the distance "AB" to suit the size of the piece of paper we had.
Once we knew the size angle wanted, and had chosen a length for "AB", we could then calculate the distance "BC", the radius needed for the arc. The following will give it to us...
BC = sine(BAC) x AB
For the 41.5 degree angle we drew at the start of this, the calculation goes as follows...
BC = sine(41.5 degrees) x 10 cm
... which is...
BC= 0.66 x 10 (I'll explain how "sine(41.5)" becomes "0.66" in a moment)
... which is...
BC= 6.6 cm... the number I gave you earlier, the radius to use when drawing the arc from B. (This is how I knew that 6.6cm used thus would make a 41.5 degree angle.)
I'll work another example in a moment. First, what's this "sine" thing?
(Sometimes you'll see "sin", but you're expected to "just know" that it is the same thing, and still pronounced "sign".)
I could "go on" about "what sine is", but for our purposes here, it is just a rule. If I ask you what is the sine of a particular number, there is just one answer, and it is a number. "What is the sine of 27?" is often written as "What is sine(27)?". And, although there are ways to "work out" the answer, no one does. They use a calculator or Google. In the Ancient Times (1980s), people looked the answers up in books which were published with tables of the sines of all the numbers. (If you use Google, search for "sine(41.5 degrees)".)
Here are a few examples of "the sine of x", to help you check whether you are looking sines up properly. (Some of these have been rounded off.)
If you are getting different answers... sine(30)=-0.99, for instance... then you may have been looking up the sines of angles measured in radians. Radians are just another way of measuring angles, like inches are an alternative to centimeters. Everything on this page is done in degrees.
As a second example, let's say you want to draw a 30 degree angle on the same sheet of paper you just used. We'll put the apex at "A" again, and re-use AB as one of the sides.
I'd suggest putting the center of the arc 22 cm from A. ("Big" is good, for the accuracy of the result... and 22 isn't too big... and we can use "D" again!) (If we used a "too big" "distance from A" number when drawing some big angles, the arc would not be on our sheet of paper. (Though we can't get a too big number if we are drawing a 30 degree angle on the piece of paper we have.) (You may have to use a smaller number, if your compass is small.)
BC = sine(30 degrees) x 22 cm
... which is...
BC= 0.5 x 22
... which is...
BC= 11.0 cm
Set the compass to 11 cm, draw the arc, draw the line from A that is tangent to the arc, and you've got your 30 degree angle! It's that easy.
A detail: Suppose you wanted to draw an 80 degree angle? You would get a better result if you constructed a line AF, at right angles to AB, and did an angle of 10 degrees (clockwise) off of that, instead of the "obvious" 80 degree angle. The line will fall in the same place! Think about why the result will be better.... if line AF is accurately 90 degrees to AB. (Happily, there are tricks with compasses for getting good right angles.)
If what the above is trying to say isn't obvious, I've done a page about how to draw an 80 degree angle by drawing a 10 degree angle. (And how to generate the perpendicular!)
This whole discussion arose in the context of drawing maps from your own measurements of angles.
Such map making will involve drawing many, many angles.
It would be quite simple to set up a spreadsheet with a few "constants" in cells at the top, and then a table below, giving the different arc radii needed for the different angles needed for the drawing of the map.
If there is sufficient interest I could produce something like that, if it isn't easy enough to do for yourself. (My contact details are below.)
You may find Wikipedia's page on the history of trigonometry interesting. Although people had worked with parallel concepts for centuries, the concept of a "sine", precisely as we use it, is credited to Indian mathematicians, around 500 AD.
It was 1100 years later that a table of sines first appeared in a book printed in England. That was Thomas Fale's 'Horologiographia, the art of Dialling', London, 1593.
(He was writing about making sun dials, hence the "dialling" in the title. The full title (spellings modernized) promises to teach... "an easy and perfect way to make all kinds of (sun)dials upon any plain plate how-so-ever placed: With the drawing of the Twelve Signs, and Hours unequal in them all. Whereunto is annexed the making and use of other Dials and Instruments, whereby the hour of the day and night is known. Of special use and delight not only for Students of the Arts Mathematical, but also for diverse Artificers, Architects, Surveyors of buildings, free-Masons, Sailors, and others". (And any of the above potentially interested parties can still buy the book on Amazon.)(Or you could buy an original of the book from Abebooks.com!)
Accurate tables of trig functions were critical to marine navigation. Because navigation is sort of the reverse of map making, if you like. First the tables had to be created, then they had to be printed, without errors. Those monumental challenges were drivers for Babbage's invention of "the first computer". (Well... one of them! His contribution was, however, indeed huge. And he was an extraordinary man. Well worth some study.)
So.. back to making your map! I hope that's why you came here? You were in the midst of trying to make your own map, by triangulation? And needed a way to draw angles accurately? Give it a try, on some level, if you weren't... it can be a lot of fun.
Search across all my sites with the Google search button at the top of the page the link will take you to.
Or...
Search just this site without using forms,
Or... again to search just this site, use...
The search engine merely looks for the words you type, so....
*! Spell them properly !*
Don't bother with "How do I get rich?" That will merely return pages with "how", "do", "I", "get" and "rich".
I have other sites. My Google custom search button will include things from them....
One of my SheepdogGuides pages.
My site at Arunet.
This page's editor, Tom Boyd, will be pleased if you get in touch by email.
![]() Page has been tested for compliance with INDUSTRY (not MS-only) standards, using the free, publicly accessible validator at validator.w3.org. Mostly passes.
Page has been tested for compliance with INDUSTRY (not MS-only) standards, using the free, publicly accessible validator at validator.w3.org. Mostly passes.
AND passes...
